DIY Garden Gazebo


green and white gazebo constructed of wood
  After enjoying some time sitting in our son's screened in porch, I was wishing we could add a little retreat to our own house. At the time we were living in a bungalow that already had an addition. Our house design just didn't lend itself to such a renovation project....we'd have to come up with an alternative.
    It took some thinking, and researching, but I finally came up with an idea. I sketched it out and showed it to Brian. As usual, he took my idea, and ran with it.  He didn't get a plan or a kit....he just started building, and figuring it out as he went along. It took some time, and a lot of interruptions, but the finished product was better than I could have hoped for.

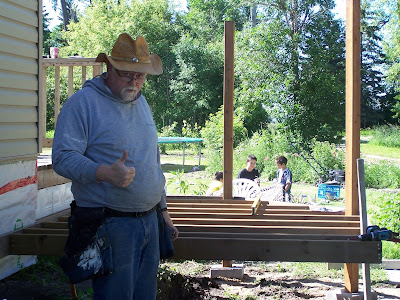
man giving thumbs up building gazebo

We're off to a good start! My boys in the background are so little!


floor construction hexagon gazebo

Brian extended our deck around the corner and added the gazebo a few feet out from the house.

floor and wall construction hexagon gazebo

Corner posts are in place.

building hexagon gazebo

Hmmm...maybe I should just back away, and let him work.

floor and wall construction hexagon gazebo

Deep in thought, or just exhausted?

roof supports hexagon gazebo

Roof supports going up

construction hexagon gazebo

Starting to close in the walls.

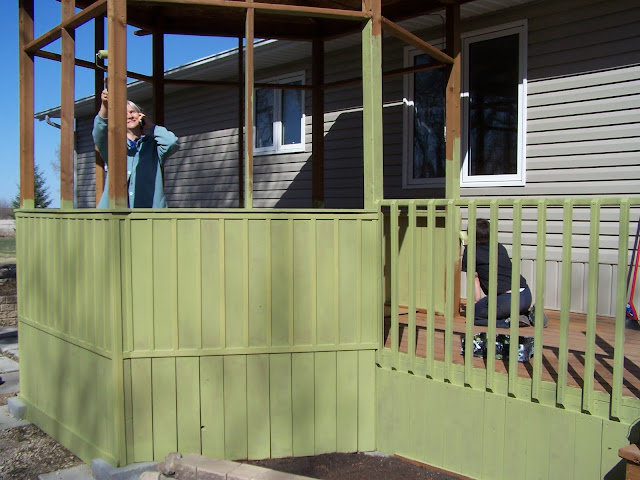
staining hexagon gazebo

Danny and I helped out with the staining....notice how talented I am....I can still talk on the phone, even when I'm working!

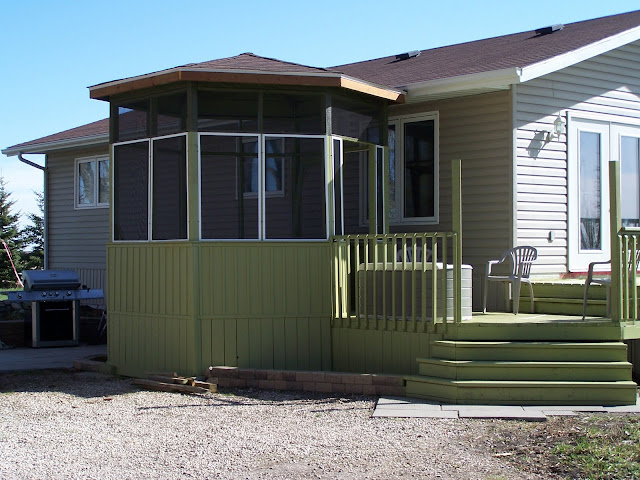
removable screens hexagon gazebo

8 gallons of stain later! The window screens are removable for cleaning and storing. The screen around the top is stapled in.

removable screens on hexagon gazebo

The door is on, and the soffit and fascia are up.


DIY screened in hexagon gazebo

Later, we added two brick planters around the gazebo.

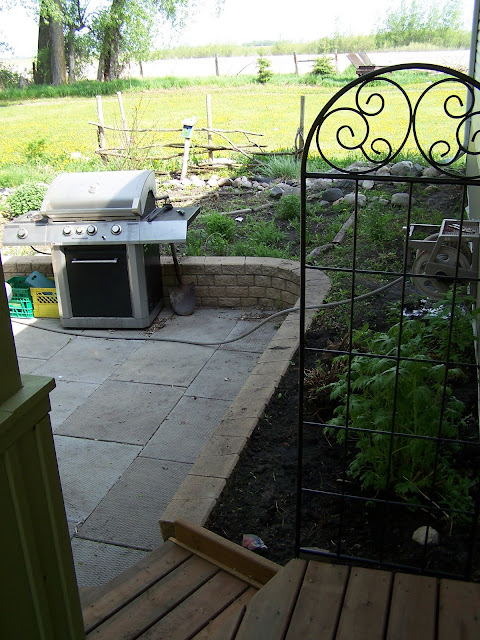
steps down from deck to patio behind gazebo

These steps lead down behind the gazebo to another patio. I loved this little corner!

Steps from deck to patio with stacked stone planters

The other planter

steps to patio

This is looking down from the deck to the patio.

stacked stone planter in front of deck

This is the front of the gazebo.

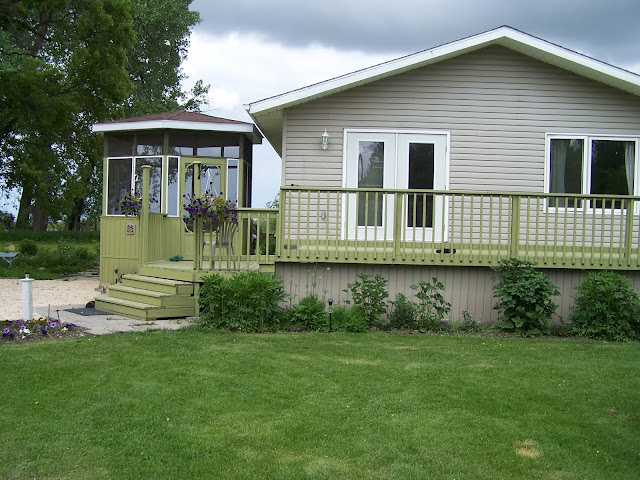
green and white hexagon gazebo

Project completed!

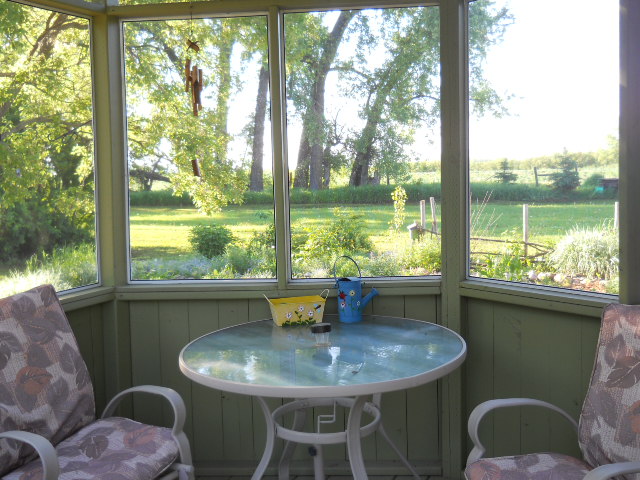
inside screened in hexagon gazebo

And it was worth all the work to have this lovely place to sit! 


  I was hard to leave that gazebo when we moved, but this time we made sure to include a back porch in our house plans. All that's left to do is add the screens, and I'll have that little retreat I wanted years ago!


Cottonwood Acres


  They say you can't go home again, and in my experience, that philosophy has held true. Returning to visit an old home is usually a disappointment, but our latest tour proved just the opposite.
  In June of 1992, we bought a house with plans to add on to it. Before we even took possession of the house, we discovered that for a variety of reasons, our plans were not going to work out...at least not where the house was located.
  So, we made the decision to move the house. We purchased five acres of open prairie, with not a tree on the lot. We paid about $7,000....I try not to think about that, given the price of land now! We hired someone to put in a basement for us, and made a deal with the house mover...we gave him the lot where the house came from, in exchange for moving it...good deal!
  By August, the house was on the new property, and we were living there. We never really moved out...the house was moved with all of our belongings inside.


I don't have a lot pictures from back then, because we gave them to someone who lived in the house after us. But the first photo shows the hole for the basement. The trees in the background are a neighbour's yard. There was not one tree on our property!


The second photo shows a flower bed,(of course) the beginnings of the garage we built, and beyond that, the trees we planted. Judging by the size of the trees, this must be a year or two after we moved there.


The last photo is when we are in the process of making a huge stream, waterfall, and pond. We already had a small pond that isn't visible in this photo. That big pond at the bottom was big enough for our kids to climb right in! At the edge of the photo, you can see a bit of a tree, so this was probably the summer of '94 or '95. We sold the house in February, 1996, and moved into Brandon....what were we thinking??

  We now live just a few miles from this house, on another acreage with very few trees, so when we saw a sign for an open house, we knew we had to check it out. The house has changed hands a few times since we owned it, and has undergone a lot of renovations. It was beautiful inside, but I was more interested in the yard. The realtor gave us the ok to take photos. 

Here we are checking out the backyard.
We planted almost every tree on this property.
No sign of  the ponds or stream,
or rock garden, and not a flower to be found.
We're used to that happening though...
Most people don't like perennials as much as we do! 
We had a big deck, but it's been replaced with a newer, and nicer one.

You can tell the soil is as sandy here as where we live now.
In over 20 years, some of the trees we planted have hardly grown!


I love the way our tree-lined driveway turned out.
You can barely see the house from the road.
And then it was time to leave.


  We've moved several times, and I've enjoyed every home we've lived in. I liked different things about each house, but I never really got attached to any them. But this yard....if ever there was a move to regret, this would be it!         
  Fortunately, I have an even better home waiting for me someday...and I'm sure that along with my mansion, God will provide a beautiful garden...and trees....lots of trees!

Manitoba Sky Monday- September 26/16

I have some beautiful photos for you this week.

We started out with some strange looking clouds last Monday!


Tuesday had a beautiful sunset....

 ....with more interesting clouds


  Thursday morning, Brian left for a three day fishing trip, and took my camera with him, so the rest of these photos were taken by him, or our son, Justin. There were so many pictures, I just picked out a few for today. I'll be making a post next week of their fishing trip to the Duck Mountains.


 They did manage to get a picture of the sunrise on Thursday morning, 
though it looked a little different from where I was standing...
wishing I had my camera!

In this picture, it looks like they have arrived at a lake....
but it's just mist!

And more mist!

The reflection of the sky on the water is beautiful!


And another misty morning!

That's it for this week. Watch for my Duck Mountains Fishing Trip Post, coming soon!

Beet & Cabbage Borscht

Bowl of beet and cabbage borsht

  If you're like me, you tend to improvise when it comes to cooking....especially soups. This may not be an authentic borscht recipe; it's one of my own making...but my husband likes it, so that's what counts, right? A while back I mentioned getting some small beets from my mom's garden. That day, I just cooked the greens, along with some swiss chard. The next day, I made the borscht you see here. 


  I don't really have a recipe, as far as amounts go. I try to not make a big pot, because it's mostly Brian and I that like it...the kids not so much....but I never seem to succeed, so I won't list the quantities.

vegetables on cutting board
Turnip is optional, but we like it, so it goes in!

bowl of chopped vegetables for beet and cabbage borscht
Veggies all chopped and ready to go in the soup pot.
Dill weed, salt and pepper not shown.

bowl of chopped cabbage
Shredded/chopped cabbage cooks down, so I add a lot.

adding chopped cabbage to pot of borscht
I bring all the other veggies to a boil (in water or broth),
 then add the cabbage.

Pot of borscht simmering
Simmer until veggies are tender.

Bowl of borscht with recipe

Perfect for a cool fall day!


Pallet Walkway Cheat

  
pallet project

  I'm sure you've seen all of those amazing pallet projects on Pinterest, just like I have. Maybe you even went out and picked up some pallets, with great plans for all the awesome things you could create.....and maybe you learned some of the same things I did................
First, I found out that pallets make a lovely backdrop for wild flowers!


 The year after we built our house, I started on a big project in our back yard....a pallet walkway. Because our yard is pure sand, I figured we could save on some top soil, by making wooden walkways insted of paths. I got all of the pallets into place, and they looked great, except the gaps between the boards needed filled....which would require dismantling other pallets. 


That's when I found out what you probably already know....it's a lot of work to take pallets apart. I even recruited my boys to help take them apart, but they gave up after several boards coming off in splinters. 
  So, my walkway sat there, unfinished. After a couple of years, the weeds had moved in, and my dreams of a beautiful boardwalk through the garden were growing dim....pieces of plywood laid on top of the pallets wasn't quite what I had in mind.


Then this spring, I decided to just pull out the pallets and redo the entire walkway...nope I wasn't ready to give up. I ended up replacing the pallets with new ones, and moved the walkway to a new area....and again it sat unfinished. But then, Brian had a great idea...forget dismantling pallets, he'd just buy treated fence boards, and lay them length ways on top of the pallets.


Jeremy helped out too....so much easier than taking pallets apart!


He even found a way to make the project fun!

Hmmm...I wonder if this is how he'll look when I bring up the next project!


Not as inexpensive as a true pallet boardwalk; the fence boards cost about $100, but it's done, and we have a nice clean pathway from the patio to the back door.


Where the pathway used to be is now more garden space.


And I can sit on my patio and enjoy the view...
while I think of the next project for Brian to do.
Yup, I learned a lot through this pallet project...
But one thing I already knew....
My husband is a pretty smart fella!